現在留学中のカリフォルニア大学サンタバーバラ校(UCSB)で、Blockchain at UCSB という組織の幹部をしてまして、一応技術担当なので組織の紹介用website を開発していたところ、最近の活動を掲載するセクションを他のメンバーでも編集できるようにしてほしいと要望を受けたため、特定の箇所のみ編集可能なhugoのcmsをgoogleのspreadsheetsを使用して作成しました。
先に完成形
完成したsheetはこんな感じです。
各項目のtitle, link, description, google driveに保存したimageのlinkが整理されています。
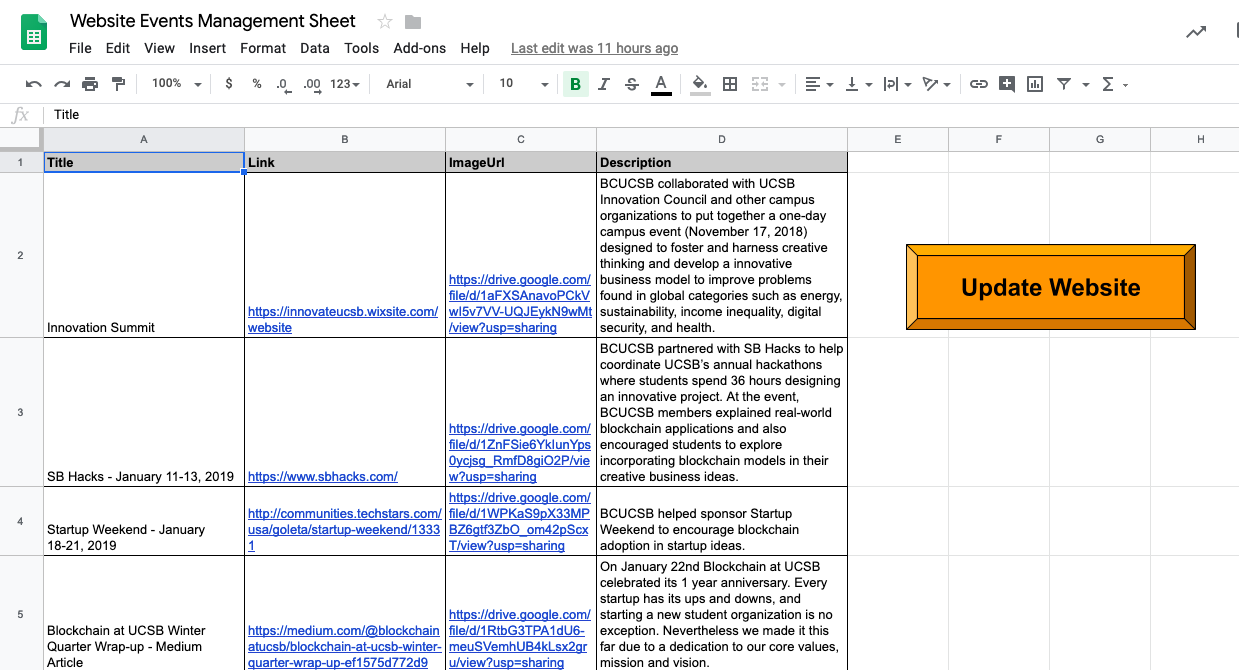
右側の派手な"Update Website"というボタンを押すと、netlifyのwebhookをtriggerしてsheetの内容を反映したwebsiteをdeployできます。
Updateすると、website のactivitiesセクションのみがsheetの内容に沿って更新されます。
以下のセクションです。

Netlify CMSや他のCMSは今回の用途にはオーバースペックだったのと、spreadsheetsをJSONバックエンドとして使用してみたいという個人的な願望があったため、あえてnetlify+spreadsheetsという構成にしました。
spreadsheetsのデータをJSONで取得
参考にしたのはこちらのサイト
- Use a Google Spreadsheet as your JSON backend
- Simple example of retrieving JSON feeds from Spreadsheets Data API
細かい説明は上記のサイトでみてもらうとして、spreadsheetsをファイル->webで公開するの順で公開してから、https://spreadsheets.google.com/feeds/list/ + spreadsheetsのID + /od6/public/values?alt=jsonにGETするとsheetの内容をJSONで受け取ることができます。spreadsheetsのIDは普通にsheetを開いたときのurlに含まれています。
自分のtitle, link, imageurl, descriptionというカラムに分けたsheetでは以下のようにデータがJSONで返ってきます。
//省略
"gsx$title": {
  "$t": "Innovation Summit"
},
"gsx$link": {
  "$t": "https://innovateucsb.wixsite.com/website"
},
"gsx$imageurl": {
  "$t": "https://drive.google.com/file/d/1aFXSAnavoPCkVwI5v7VV-UQJEykN9wMt/view?usp=sharing"
},
"gsx$description": {
  "$t": "BCUCSB collaborated with UCSB Innovation Council and other campus organizations to put together a one-day campus event (November 17, 2018) designed to foster and harness creative thinking and develop a innovative business model to improve problems found in global categories such as energy, sustainability, income inequality, digital security, and health."
}
Hugoでsheetの内容を表示する
Hugoで上記のJSONデータを表示するため、getJSONでデータを受け取るのですが、上記のようにJSONのプロパティ名に$(ドル記号)が入っているとhugoではエラーが発生してしまいます。これを回避するため、以下では$が含まれる箇所を正規表現で取り除いています。
ここでは、Hugoのconfig.tomlにSite ParamとしてGoogleSpreadSheetIdを設定しており、partialの先頭でspreadsheetsのendpointを組み立てています。
{{ $googleSpreadSheetEndpoint := printf "%s%s%s" "https://spreadsheets.google.com/feeds/list/" $.Page.Site.Params.GoogleSpreadSheetId "/od6/public/values?alt=json" }}
{{ $json := getJSON $googleSpreadSheetEndpoint }}

{{ $entries := $json.feed.entry }}

{{ range $entry := $entries }}
  {{ $scratch := newScratch }}
  {{ range $key, $value := $entry }}
    {{ if hasPrefix $key "gsx"}}
      {{ $sanitizedKey := replaceRE "^gsx." "" $key }}
      {{ range $k, $v :=  $value }}
        {{ if (eq $sanitizedKey "imageurl") }}
          {{ $imageId := replaceRE "^https?://drive.google.com/file/d/(.*)/view.usp=sharing" "$1" $v }}
          {{ $v = printf "%s%s" "http://drive.google.com/uc?export=view&id=" $imageId }}
        {{ end }}
      {{ $scratch.Set $sanitizedKey $v }}
    {{ end }}
  {{ end }}
{{ end }}
imageurlを加工しているのは、google driveに保存されたimageのurlをそのまま使用してもwebsiteに画像が表示されないためで、urlをhttp://drive.google.com/uc?export=view&id=に置き換えて対応しています。
また、加工したJSONのプロパティ名をkeyにvalueを一時的に保持するため、.Scratch というscratchpadの役割を果たすhugoの備え付け関数を使用しています。ここでは一時的なDictionaryのように用いています。
partial全体像
結果として作成したhugoのpartialは以下のようになりました。
spreadsheetsから取得したJSONのfeed.entryに含まれる配列をrangeで繰り返し処理しながら各eventの項目を展開しています。
| |
これで、このサイトをbuildするたび、spreadsheetsの内容が反映されるようになりました。
SpreadsheetsにUpdateボタンを設置する
Spreadsheetsを更新するたびwebsiteに表示されている内容も更新されてほしいので、sheetにボタンを設置します。
Spreadsheetsのツール->スクリプトエディターから、google apps scriptを以下のように記述します。
function updateWebsite() {
  var url = "netlify_build_hooks_endpoint";
  var payload = {}
  var options = {
        "method"  : "POST",
        "payload" : payload,
        "followRedirects" : true,
        "muteHttpExceptions": true
  };
  var result = UrlFetchApp.fetch(url, options);

  if (result.getResponseCode() == 200) {
    Logger.log(result.getContentText());
  }
}
netlify_build_hooks_endpointにnetlifyでホスティングされている方は自身のサイトのbuild webhookを入力してください。
このスクリプトのupdateWebsite()という関数をspreadsheetsから実行することにより、netlifyのbuild webhookに対して空のpostリクエストを送信し、websiteをbuildすることができます。
ボタンの設置とgoogle apps scriptの連携に関しては、こちら を参考にしてください。
おわりに
Spreadsheetsはシェアが簡単でかつ多くの人に馴染みのあるツールなので、今回のような開発者ではない人に提供するインターフェースとしてはとても便利で優秀なんじゃないかなと感じました。他のプロジェクトでも機会があれば利用していきたいです。
